How to Extend Your Gutter Downspout
Jul 20, 2023

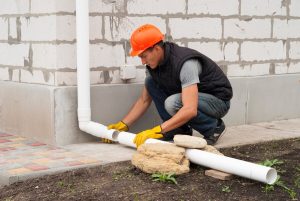
Extending rain gutters and downspouts can increase the efficiency of the roof and guarantee the protection of the house. You can add more drain pipes underground to ensure water from the downspouts does not pool near the house, thereby managing roof runoffs more effectively. However, gutters that do not have extensions do not carry melted snow and water a safe distance from the house, which can still result in basement crawl spaces or foundation damage.
A downspout extension must be non-perforated, but it can be flexible or rigid depending on where it is to be installed. For instance, if the terrain is uneven, a flexible pipe will be used. Other than choosing the correct materials, knowing how to install a downspout extension properly can also affect their durability and how well they function. Otherwise you might need a roofing repair company to take care of your home’s roof.
How do you extend a gutter downspout? The answer involves laying, marking, digging the trench, putting down the pipes, and inserting the starter elbow, reducer, and adapter, among other steps.
How Far Should You Extend a Downspout?
How far should the downspout extend from the house? This is one question homeowners struggle with. The answer differs with every person depending on several factors, such as the kind of landscaping you have, where you live, and accessibility. However, the standard rule is to have the downspout extension at least 4 feet away from the house. Some roofers recommend at least 3 feet, while others prefer 6 feet. The longer the extension, the better the protection to the house. Keep in mind that the method of extension used can also play a role in how long you end up extending these fixtures. For instance, extending downspouts using the underground method is usually more tiring and time-consuming than extending them above ground.
When considering how far to extend downspouts, you must also consider the soil type near the house and the slope. For example, if builders fill sandy soil around the foundation and the slope is not even, water can easily flow back and destroy the basement. Some answers to how do you expand a spout include installing a splash block, using underground drain pipes, and investing in a rain barrel.
Things You Need for a Downspout Extension
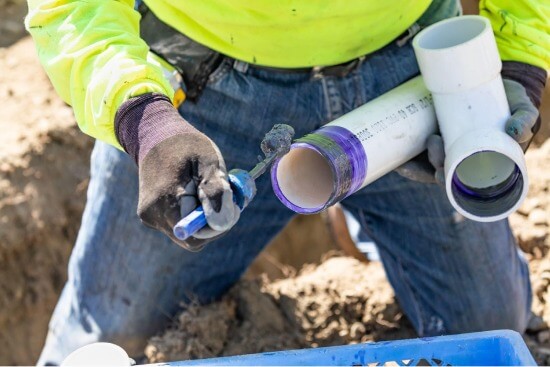
Installing a downspout extension involves the use of several other accessories such as couplings, PVC elbows, and adapters. T-fittings and other fixtures that allow you to join the pipes together will also be needed. Make sure you also buy some primer and cement to seal all the components together.
Simple Steps That Help to Extend Your Downspout
Mastering how to extend a gutter downspout does not require special training or skills and can be done as a DIY project. The process is usually simple and involves three steps only. First, you will have to dig a trench, put in the pipes, and fill the hole with soil. Below are some simplified steps that can get you professional results.
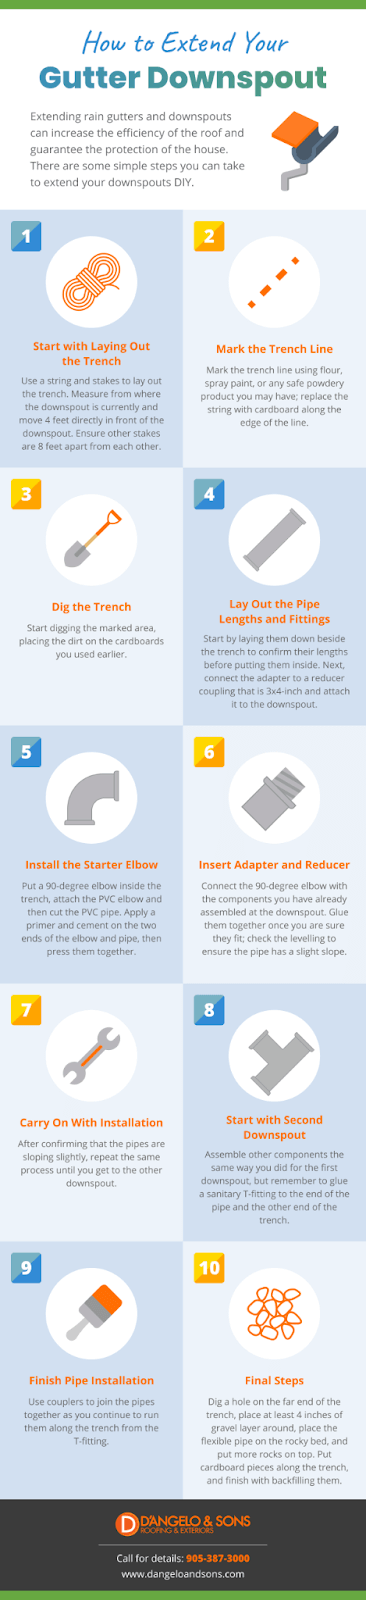
1. Start with Laying Out the Trench
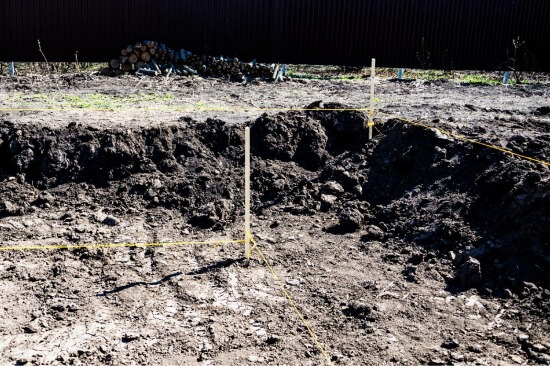
The trench has to be measured precisely to ensure it maintains the required dimensions. Use a string and stakes to lay out the trench. Start measuring from where the downspout is currently and move 4 feet directly in front of the downspout. Ensure other stakes are 8 feet apart from each other. Tie the string from the downspout to all the stakes.
2. Then Mark the Trench Line
Once you have secured the string between the downspouts and the stakes, mark the trench line using flour, spray paint, or any safe powdery product you may have. Once you get your straight line, replace the string with cardboard along the edge of the line.
3. Time to Dig the Trench
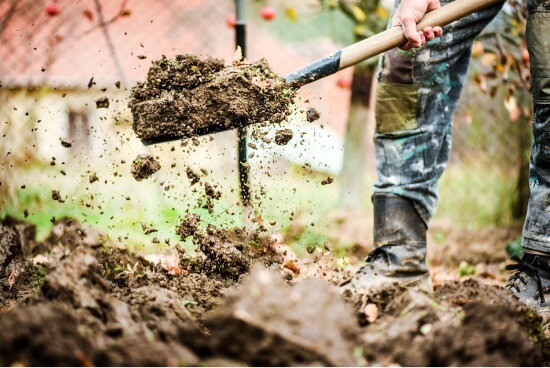
Start digging the marked area, placing the dirt on the cardboards you used earlier. Although it is not mandatory, this procedure will help you fill back the trench quickly. This step requires you to pay attention because the hole must have a slight slope. It should also have a width of at least 6 inches, with the slope being maintained every 1 or 2 inches to maintain a smooth flow from the downspout. Keep repeating the process as many times as possible to complete the trench.
The tools you use will depend on the type of soil around the house. Sometimes a shovel may not suffice, especially if the soil is rocky. It may also take you longer to complete the trench if you have compact soil. If you cannot manage hand digging, rent a machine from your hardware store or borrow from a friend. You could also hire a backhoe operator for faster results. You may still have to monitor the digging to ensure the landscape is not damaged. Ask the operator to use a 12-inch trenching bucket.
The depth should be at least 10 inches, but you have to factor in the climatic conditions in your region. In most cases, ice can clog the pipes during winter in areas with extreme conditions. It happens when the temperature fluctuations during the day and night are extreme. For instance, if you get freezing temperatures at night and mild ones during the day, the pipes will be clogged. You may have to dig deeper to prevent that from happening. For example, you may have to reach at least 32 inches below the frost line to keep the pipes at optimal temperature. Some areas may require you to go as low as 48 inches. Remember, the installation will only be functional if there is a drain line at that depth.
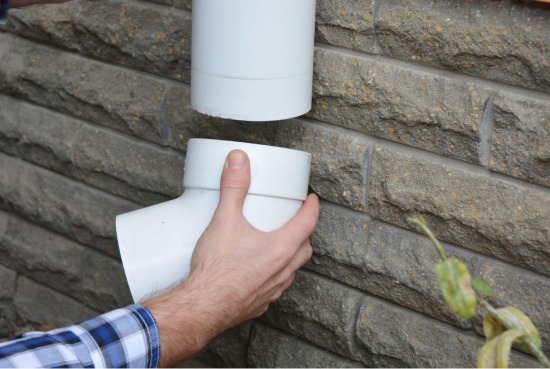
4. Move Onto Laying Out the Pipe Lengths and Fittings
When the digging is done, your next step will be to lay down the pipes. Start by laying them down beside the trench to confirm their lengths before putting them inside. Doing this will also help you confirm whether you have all the components. Next, connect the adapter to a reducer coupling that is 3×4-inch and attach it to the downspout.
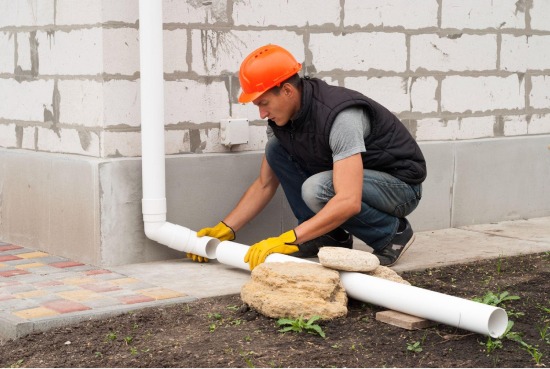
5. Install the Starter Elbow
Put a 90-degree elbow inside the trench directly under the coupling and measure the distance between the two. Use a primer and cement to attach the PVC elbow. Cut the PVC pipe, keeping the exact length that you have measured. A handsaw, power mitre saw, and hacksaw can all be used for this. Apply a primer and cement on the two ends of the elbow and pipe, then press them together. Twisting them slightly and holding them in place as you connect them can give the cement enough time to cure properly.
6. Make Sure to Insert Adapter and Reducer
The next step is to insert an adapter and reducer into the pipe connected to the elbow. This should be done after the adapter is slipped into the downspout, but glue or adhesive is not necessary at this point. Next, move to the first turn on the trench and use another 90-degree elbow. You will need another piece of pipe to connect it with the components you have already assembled at the downspout. Glue them together once you are sure they fit, but remember to check the levelling to ensure the pipe has a slight slope.
7. Carry On With Installation
After confirming that the pipes are sloping slightly, repeat the same process until you get to the other downspout. Standard couplers can be used to connect the pipe stations.
8. Start with Second Downspout
Assemble other components the same way you did for the first downspout. The only difference is that you will glue a sanitary T-fitting to the end of the pipe and the other end of the trench. The curves of the elbow on the T-fitting should face the right direction, which is a downslope. Next, connect the drainage pipe from the initial downspout to the T-fitting from the second downspout to get one outlet.
9. Finish Pipe Installation
Use couplers to join the pipes together as you continue to run them along the trench from the T-fitting. It will be easier to get the required length.
10. Final Steps
When using a flexible pipe, gluing a 3 by 4-inch reducer coupling to the rigid pipe in the trench is recommended. After that, pass the flexible pipe over the coupler and secure it in place with a pipe clamp.
Dig a hole on the far end of the trench, keeping it shallow but wide. A depth of 16 inches and a diameter of 36 inches is recommended. Place at least 4 inches of gravel layer around it, but flat rocks can be a good alternative. Place the flexible pipe on the rocky bed, then place more rocks on top.
Place cardboard pieces along the trench, then finish with backfilling them. A garden hose can help to easily pull the dirt from the cardboard back into the trench.
Recent Posts
-
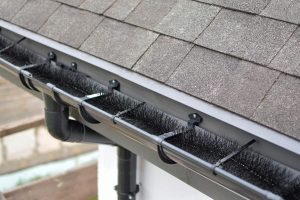
How to Choose the Best Gutter Guards?
The best gutter guards prevent gutters from being clogged by debris. So, do...
-
Extending A Gutter Downspout – Downspout Extension Everyone Can Master
Rain gutters and downspouts are your first line of defence against a flooded ...
-

How to Pick the Right Shingle Colour for Your Roof
Your roof is extremely important to the overall appearance of your home, impacting...
-

How to Safely Remove Snow from Your Roof
You should keep your roof as snow-free as possible to prevent ice dams from...
-

How to Decorate Your Roof Without Damaging It
Christmas is almost here, and for many Canadians that means decking their homes...
-

The Importance of Cleaning Fallen Leaves
Nobody likes ridding their property of fallen leaves; it’s hard work, it’s time...